 Used: Plantin
Download MEGAN - Plantin Namebook Here
 Used: Mickey Font
Download MEGAN - Mickey Font Here
 Used: Alphalicious and George
Download MEGAN - Alphalicious & George Here
 Used: PlantinUsed: Mickey FontUsed: Alphalicious and George


 This frame can be adjusted to whatever size you want to make to. Created for a blog reader of mines.
 On the 2nd card, I sponged the edges of the flower lei to give it some definition. Again, used stickles for each middle. Plain Jane, but something Aloha to send quickly is always sweet.
 Here is what the altered cut looks like, and is also on the cut file... as you can see I've enlarged
  the letters a little more, and some are now welded to the lei itself. Hope you like this one.
 machine, and went stitching. At least it's still going to good use, rather than just sitting there on my table of machines. I have to get me more thread, and do a lot more sewing though.
 Have an awesome week....
 well for this challenge. The challenge is to create a Halloween themed card, using this sketch. I turned the sketch on this project, and since I had some left over embossed thingies, I thought they'd go great on here. Using my Design Studio, I created the sentiment by welding the letters together, and adding a spider to the sentiment. I cut out the spider in
  black n' it's body in orange to give it a 3D layering. You can download the sentiment if you'd like. I've also included the body of the spider for exact fit, and an exact cut of the spider's full body to layer your spider in what ever color you want. On my "map" I note what colors I've used for each cut, this is not part of the file download.
 Download Halloween Spider Sentiment
 I am also selling the cuts for those that don't own a Cricut. Click here if you'd like to get your hands on these.
 adjust accordingly to the exact size that I want. I then move the design over to the right, and select the cardstock that I want to use. Adhere the size of the carstocks (which I used 6x6) to the mat, 1 red, the other white, and have both cuts cut at the same time!!! How cool, huh?!?!!? To add the glitter - I simply ran the swirl die cut through my Xyron machine, then bathed it in my glitter container.

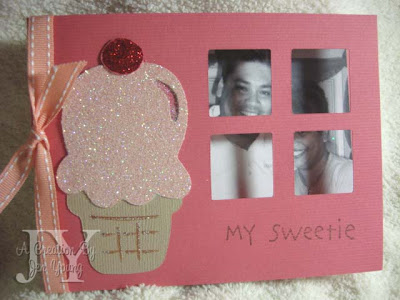 The one thing I am loving about the Cricut's Design Studio, is that I can copy some of the cuts that Sizzix put out there. Sizzix has come out with a ton of window cut dies, which with some patience and time, is easy to recreate and cut on a Cricut Machine. I do have a Sizzix Machine, but figure if I can do the cut on my Cricut, why spend money, AND take up MORE space than I already am using?! So, if I can mimic a cut that Sizzix has, then whooop-tee-dooooo for me (and those of you who agree with me and want to use these cuts as well). Although the downfall of cutting this with a Cricut Machine, is that of not being able to cut through a chipboard, however, most of my creations don't consist of chipboard anyways. Like this card. I don't plan on cutting
 this on chipboard, and then adhering to a card front. This was cut directly on cardstock. Like the Sizzix window die cuts, the Cricut Design Studio allows you to move your windows wherever you want them to be.
 To download this cut, click here:
 Here is what the cut looks like after coming out of the machine. As you can see, everything is connected to each other - I love this feature!!!


