Hi All... I made a shaker card for a 1st birthday party we attended today, and did a tutorial on it. Here is a photo of the completed card, when you shake it, the beads that is inside the "1" will move back n' forth. So, here's how I made it....
Suuplies: I used my Cricut Expression and Design Studio to help me create this card. You will also need a sheet of acetate, and some dimensional double stick tape, you could use 3M or other striped type of foam double stick tape. You will need beads to create the "shake" in your card. I used SU!'s bright beads - not sure if they are extincted or not. Rubber stamp images to decorate your card, and stamps for sentiments.
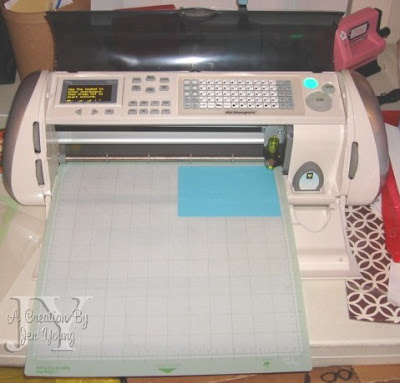
Ok, so I set up my Cricut, only using the size of what I would like my card to be - which is 4-1/4" x 5-1/2". I load it into my Cricut.

Using the Design Studio program, I know exactly where I am going to cut my "1" at, I just need to make sure that I do not go beyond the measurements of my card. I used the cartridge Alphalicious for this project. I then cut the # out - thus creating a window for my project.

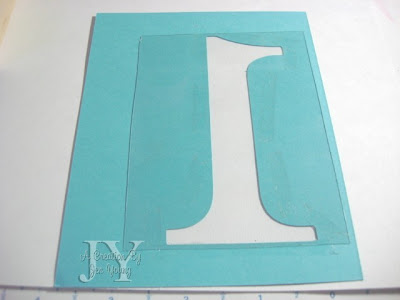
Here is the cut out that I did with the Cricut.

Now, for acetate - I am using the flat part of a TAC plastic stamp container. I have been saving these ever since I've signed up with TAC, and now these are one of the ways I can use them. Cut out the flat part, and use as a window for my shaker card creations.

After I cut out the flat part of the plastic stamp container, I adhere it to the back of the card. Make sure it is secured and it will not move. I used my ATG tape. =0)

Apply double stick foam tape around the perimeter of the window, be sure to make sure all edges of double stick tape are touching, and enclosing a little section - as this is the area where the beads will be contained.

Now apply double stick foam tape on the edges of your card stock (use the same ones, because if you use another type, the thickness of the difference in tape will throw off the project).

Peel off protective covering of tape (it's easier to peel protective layer off before adding the beads, to lessen the amount of beads bouncing out of the barriers. Add the amount of beads you would like to within the enclosed barriers of the double stick foam tape. I am using this mini spoon that you could collect from 31 Ice Cream (go and ask for some samples, and keep the spoons for free) - or you can purchase them from your LCS (Local Craft Store) for about $5 for 10. Push in any stray beads that stick to the foam tape. Don't RUSH!!!
 Spread beads out, if beads are on top of each other, sealing the card will be a problem. Make sure all beads are leveled, and not piled on top of each other.
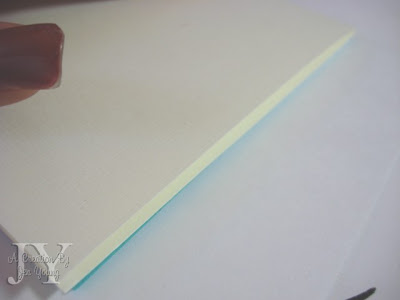
Take a card base, that you will place right on top of your shaker creation, lining it up with the edges (you can see a tint of blue right where I lined up my card). The sticky of the double stick foam tape will adhere the card stock to the card base.

Flip over, decorate with other stamp images (I used the AL stamp set that I got from my girlfriend Cheryl - thanks chickie!!!), I then cut out the images, and placed where I wanted them to go. Stamped the sentiment directly onto the card. Now shake around, and see those beads move up n' down.
 Hope you likes this tutorial, and you'd get a chance to make one of your own. Let me know - I would love to see it!!
Aloha and have a great weekend!!!
Jen

4 comments:
That's awesome, i'm going to have to try to make that! Thanks for always sharing your great ideas!
OMG Jen I can't wait to get myself a cricut this christmas... So many possibilities..... Love it love it...
hey Jen... great, I never knew how to make one of these
That is a very cool idea! Thank you for sharing it! :)
Post a Comment